How to Disable Dynamic DNS Updates on Windows Systems
Why you should consider disabling the Dynamic DNS Updates serviceMicrosoft Windows operating systems support a feature that dynamically updates the mappings of domain names to associated IP addresses assigned to hosts by DHCP servers. This automatic updating, called Dynamic DNS Updates service, reduces the administrative overhead associated with manually administering DNS records of network hosts. While this service can reduce administrative overhead, it also can, and does, have deleterious effects on the larger Internet by leaking traffic regarding private IP addresses that should never leave the local area network. You do not need to disable dynamic DNS updates if:
However, if you have configured your host to act as a DHCP client/server and you make use of the private IP address space (including 10.0.0.0/8, 172.16.0.0/12, and 192.168.0.0/16) specified in RFC1918, you should turn off the dynamic DNS update feature. Only if you know with certainty that the updates get sent only to a local DNS server should you run the Dynamic DNS Updates service. Most home users who use DSL/Cable routers as DHCP/NAT servers to facilitate multiple host connections to the Internet should turn off dynamic DNS updates. ``So what if my host leaks a few packets to the global Internet? Why should I bother turning it off?'' The reason is that inconsistent configuration between your home hosts and your local DNS servers can, and often does, cause leakage of DNS updates for private IP addresses to the global Internet. This leakage causes the following problems:
Unfortunately, most users have no knowledge of their own misbehaving hosts broadcasting private information to the world. The default configuration not only wastes global Internet resources but also introduces a multitude of security, privacy and intellectual property concerns.
Leakage of private DNS updates is caused by inconsistent configuration between DNS servers and DHCP client/server entities. The following list illustrates a typical example of how a private DNS update leaks out to the global Internet.
In the first two steps above, a DHCP client requests and obtains a private IP address from a DHCP server. Next, the DHCP client tries to update the forward mapping (type A RR) from the domain name (hostname.example.com in the example) to its newly obtained IP address. The DHCP client first sends a query to its local domain name server (LDNS) and asks for the authoritative server for the zone of its domain name (step 3). Once the DHCP client receives a response (step 4), it sends the update to the indicated server (step 5). Similarly, steps 6-8 update the inverse mapping from the IP address to the domain name (type PTR RR). In the correct setup, the LDNS should point the DHCP client to a domain name server (could be itself) inside the internal network. However, in many cases when the DHCP and DNS configurations have inconsistencies, the LDNS may direct the DHCP client to a place outside the local scope, resulting in leakage of private DNS updates to the global network. In the example shown above, the LDNS is not configured with a local zone for 168.192.in-addr.arpa. The LDNS thus iteratively sends the SOA request, starting with a root DNS server, and eventually returns the prisoner.iana.org (an AS112 server) as an authoritative server to the client (step 7). The DHCP client then sends the update for the reverse mapping to the prisoner.iana.org server (step 8).
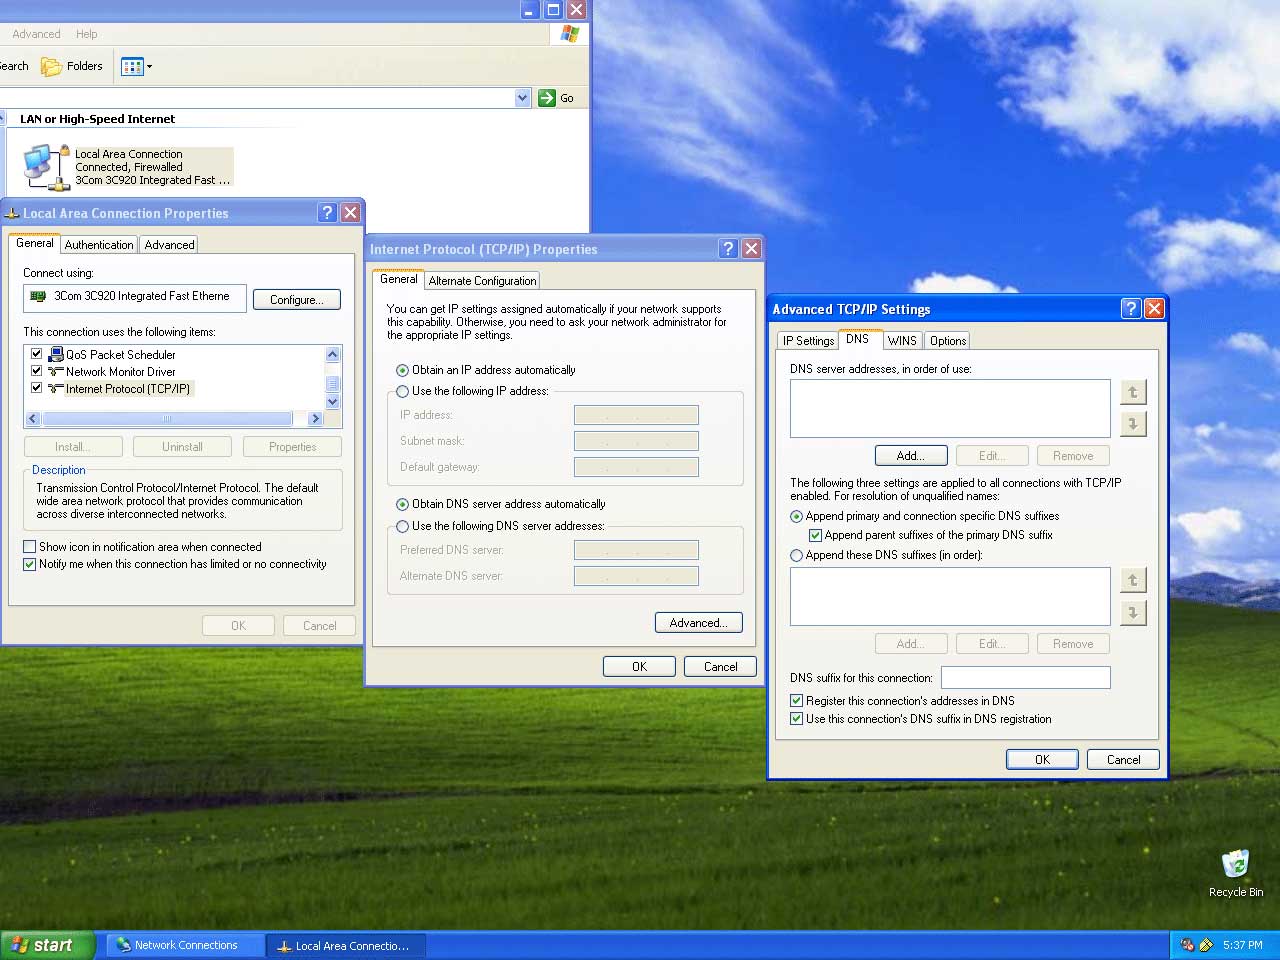
Over 97% of DNS updates that leak onto the global Internet come from Microsoft Windows™ operating systems (see companion paper on The Windows of Private DNS Updates). The following steps only illustrate how to turn off dynamic DNS updates on Microsoft Windows™ systems. For Linux or FreeBSD systems that use ISC's DHCP client and server software, the dynamic DNS update feature gets set to off by default and requires manual intervention to turn on the service. Both DHCP clients and servers can generate DNS updates. To turn off DNS updates on Windows 2000/XP/2003 configured with DHCP clients (refer to Figure 1):
Click on the image below for a larger view of the screenshot. (1280 x 960 pixels)
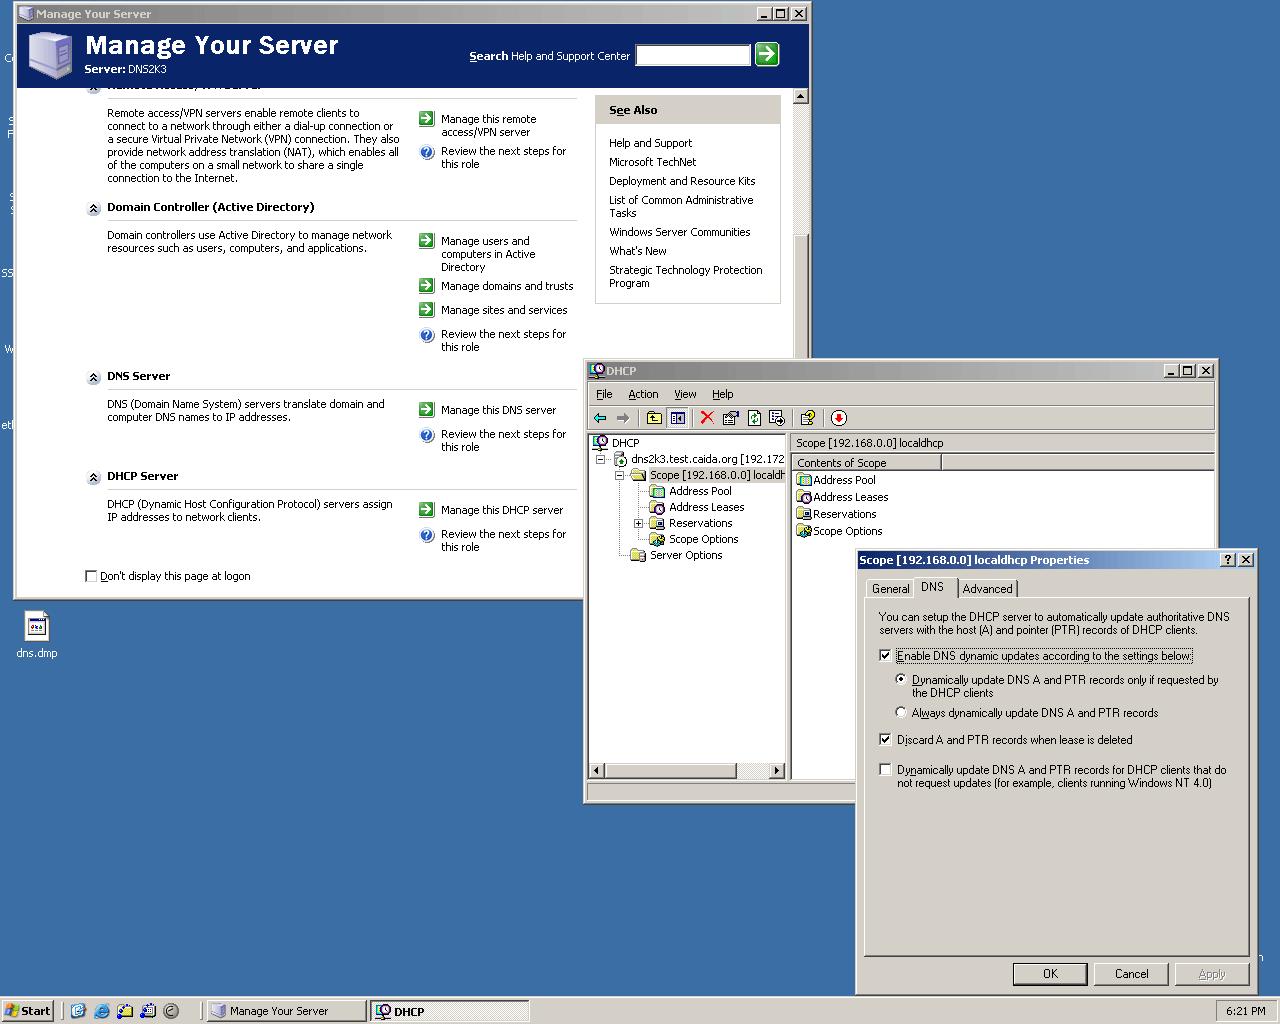
To turn off DNS updates on Window Server 2000 running DHCP Server (refer to Figure 2 below): Microsoft Windows Server 2003™ automatically sends DNS updates to each of its DHCP clients. To turn this feature off, follow the steps below:
Click on the image below for a larger view of the screenshot. (1280 x 1024 pixels)
Figure 2: The Microsoft Windows™ user interface for configuration of DNS Updates on Windows Server 2003 running DHCP Server. |