

How to Connect and Use Resources on NRP
Using CAIDA Learning Modules: Student Guide
Getting onto the NRP Namespace
Start at the “Getting Started” page on the NRP website.
-
Follow steps 1-6, beginning with pointing your browser to the NRP Nautilus portal and ending with the step that directs students to contact their research supervisor to be added to a namespace.
-
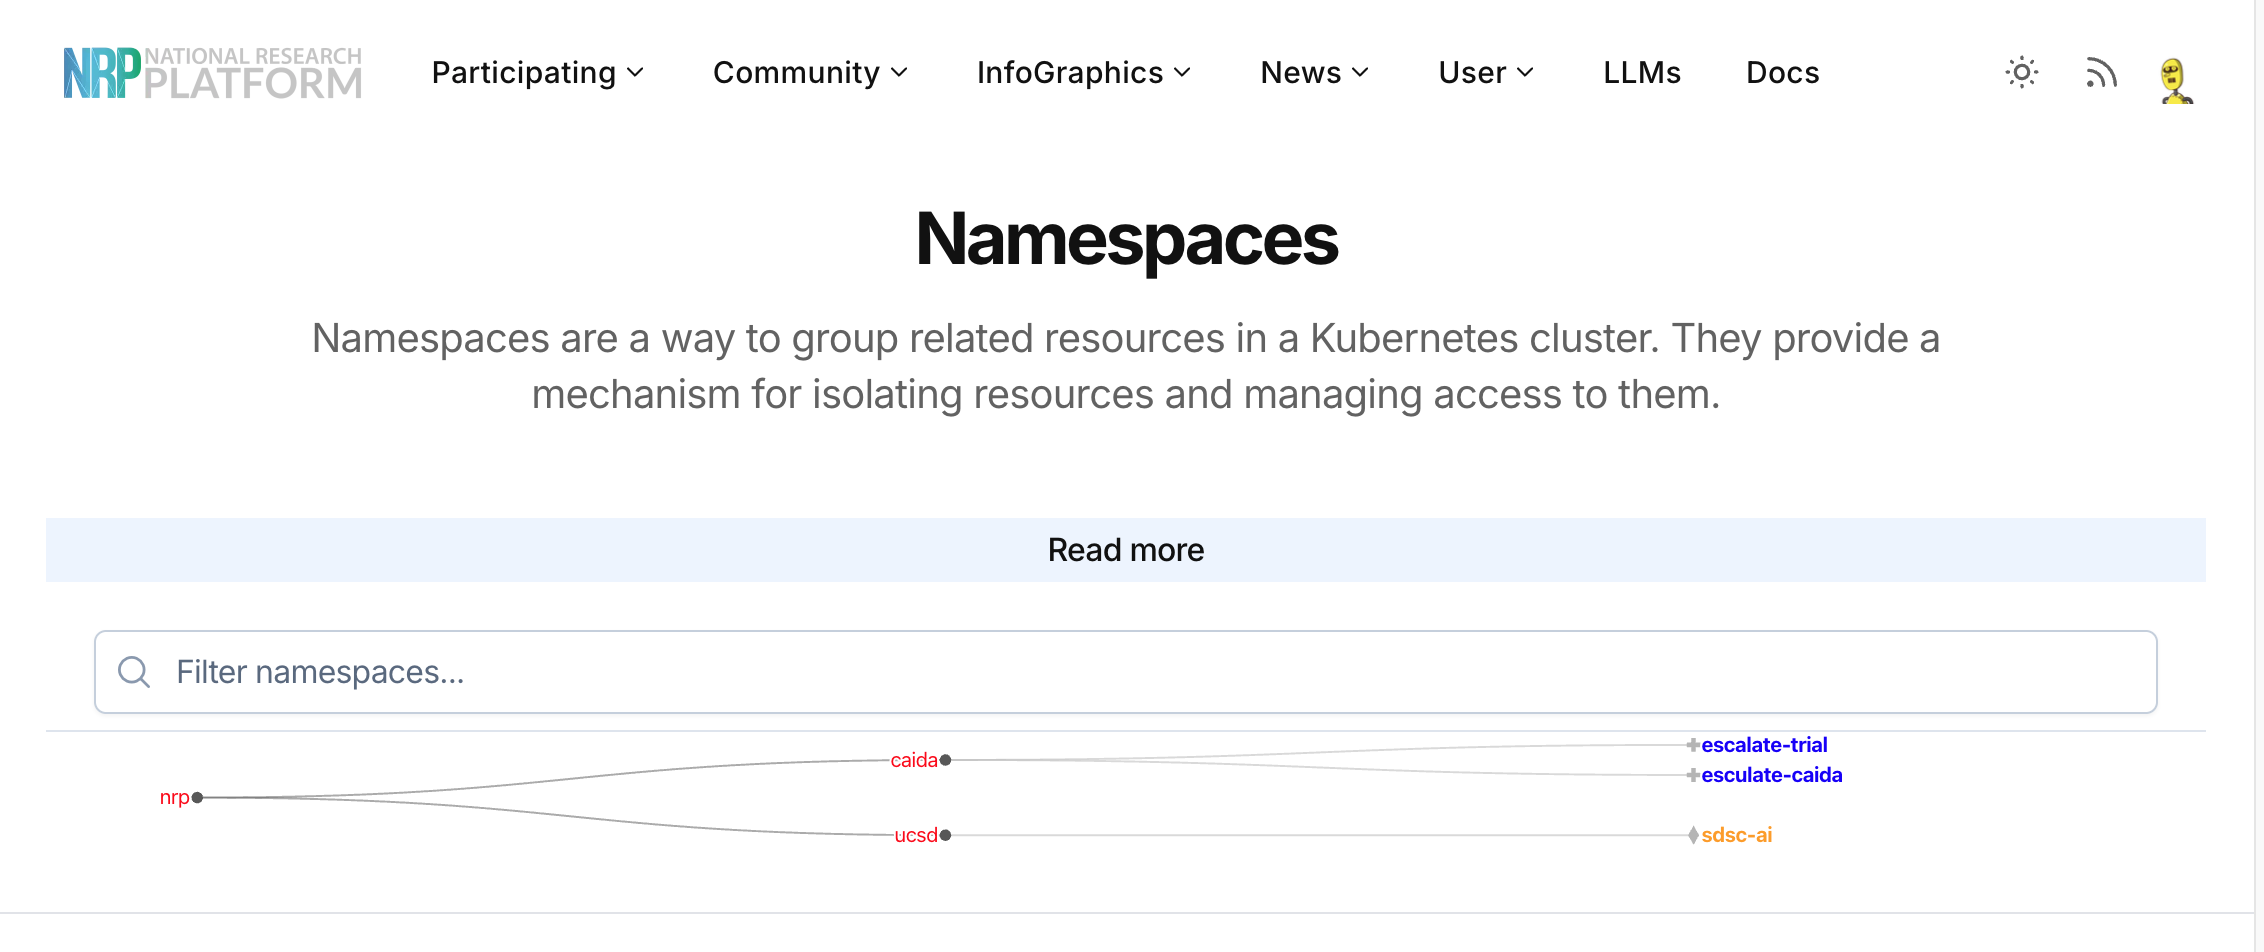
Once your research supervisor has added you to the namespace, go to https://nrp.ai/. Hover over “User” in the top menu, then click “Namespaces” to confirm you have the right one. It should look something like the image below:
-
You should now be able to access JupyterHub. Go to https://jupyterhub-west.nrp-nautilus.io. It will prompt you to sign in with Authentik.
You can read more about the JupyterHub service here.
-
After signing in, you’ll be shown server options. The preset works fine. Scroll to the bottom and click “Start.”
Your server will take a minute or two to start up.
-
From here, follow the module instructions provided by your instructor.
Joining the GitHub Classroom
-
Go to the link your research supervisor provided for Github Classroom. If you don’t see your name listed, skip to the next step.
-
Click “Accept” on the assignment screen.
Note: There’s a known bug where the confirmation page may say the repository wasn’t created properly. It usually was. Check your personal GitHub repositories for a new repo called
[name-of-the-module-repo]-[your-github-username]to confirm.
Copying the GitHub Template to Your Jupyter Workspace
-
Go to your JupyterHub at https://jupyterhub-west.nrp-nautilus.io.
-
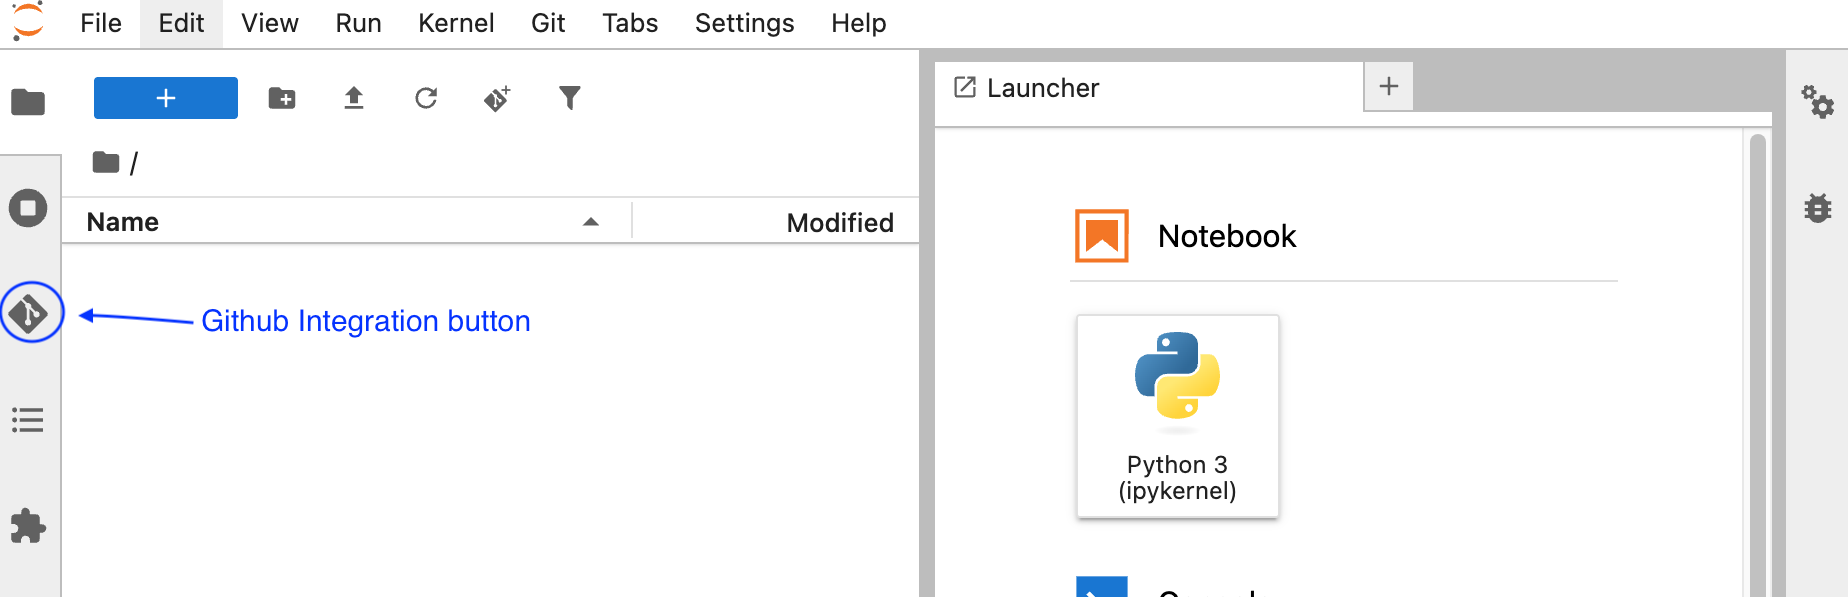
Use the GitHub integration in the sidebar to clone the repository containing your module.
Note: You may need a GitHub personal access token to push changes to your repository later on.
-
You’re set. Start working on your module inside of your JupyterHub notebook!