

How to Connect and Use Resources on Expanse
Using CAIDA Learning Modules on Expanse: Student Guide
SDSC Expanse is allocated through ACCESS, the NSF-funded national cyberinfrastructure program. Getting onto it takes three steps: register for an ACCESS account, get added to a project allocation, and enroll in two-factor authentication. After that you can log in and start a notebook.
Getting an ACCESS Account
-
Register at https://account.access-ci.org/register. Use your institution or university email address.
-
Send your ACCESS ID to your instructor or principal investigator so they can add you to the project allocation.
PIs and co-PIs add users to a project through Manage Allocations in the ACCESS portal — you cannot add yourself.
Forgot your password? Reset it at https://account.access-ci.org/password.
-
If you are not joining an existing class project, request your own allocation through the ACCESS Allocation Request System. An Explore or Discover tier request is lightweight and enough to get started. Alternatively, email consult@sdsc.edu for an SDSC trial account — the fastest path to a shell prompt.
Note: CPU and GPU hours are allocated separately. An Expanse CPU award does not include GPU hours.
Enrolling in Two-Factor Authentication
Expanse asks for a time-based one-time password (TOTP) code every time you log in, so enroll before your first login attempt.
-
Install an authenticator app on your phone — Google Authenticator, Duo Mobile, or any app that can import a TOTP secret from a QR code.
-
Go to https://passive.sdsc.edu and choose Log In Using Globus.
-
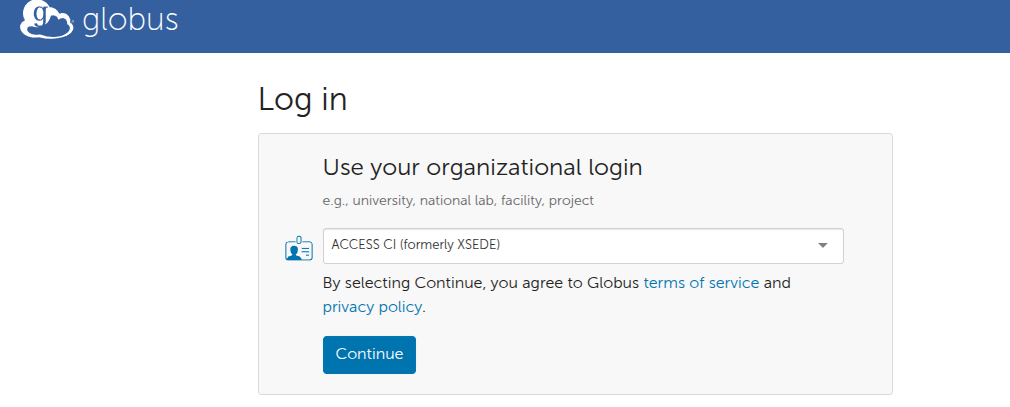
On the Globus page, select ACCESS CI (formerly XSEDE) from the organization menu — not your university or institution. This is the single most common enrollment mistake.
-
Log in with your ACCESS ID and password. If Globus offers you a choice of identities, pick the one ending in
@access-ci.org.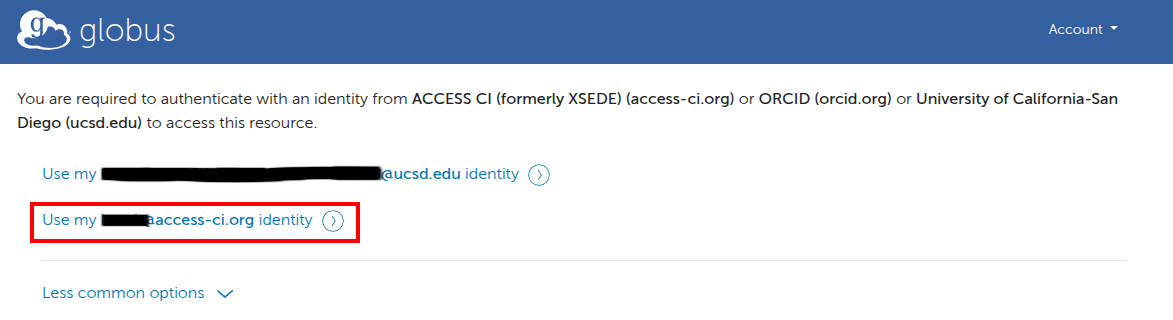
-
Click Manage 2FA and follow the instructions to pair your authenticator app by scanning the QR code.
Wait up to 15 minutes after enrolling. The change has to propagate to the login nodes before it takes effect.
Logging In
There are two ways in. The portal requires nothing installed on your machine; SSH is worth setting up once you are working regularly.
Option 1: Expanse User Portal
-
Go to https://portal.expanse.sdsc.edu/, choose ACCESS CI (formerly XSEDE) from the pull-down menu, and click Continue. As above, do not choose your university.
-
Log in with your ACCESS ID and password, selecting your
@access-ci.orgidentity if prompted. -
Click expanse Shell Access to open a terminal on a login node in your browser.
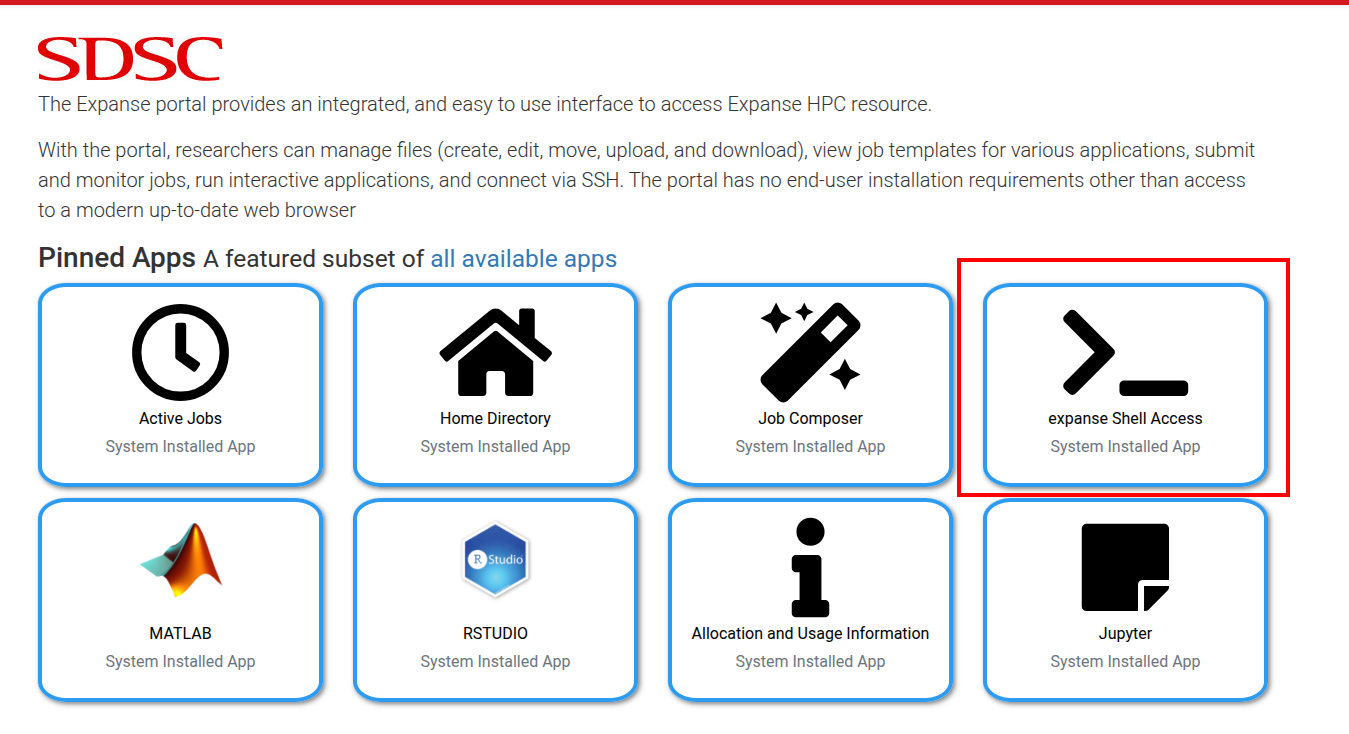
The portal is an Open OnDemand deployment. Alongside shell access it offers file management, job submission and monitoring, and launchers for Jupyter, MATLAB, and RStudio.
Option 2: SSH
-
Open a terminal on your own machine and connect:
ssh <your_username>@login.expanse.sdsc.edu -
Enter your ACCESS password, then the six-digit code from your authenticator app — use the entry listed under
sdsc.edu: <your_username>.
Adding this block to
~/.ssh/configon your local machine lets you connect with justssh expanse. It also reuses a single authenticated connection for four hours, so you enter your TOTP code once instead of once per connection:Host expanse HostName login.expanse.sdsc.edu User <your_username> ServerAliveInterval 60 ControlMaster auto ControlPath ~/.ssh/cm-%r@%h:%p ControlPersist 4hNote: Login nodes are shared. Editing files, running
git, and submitting jobs are fine; running your analysis on them is not. Use an interactive session or a batch job instead.
Confirming Your Project Allocation
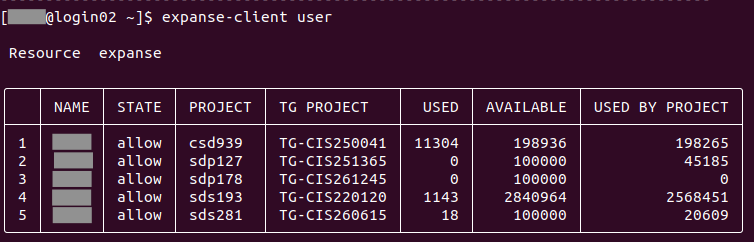
Once you have a shell, check which projects you belong to:
expanse-client user
The PROJECT column gives the project ID you pass to Slurm as --account.
Starting a Jupyter Notebook
Notebooks run on compute nodes, not on login nodes. There are two ways to start one.
Option 1: Expanse User Portal
From https://portal.expanse.sdsc.edu/, open the Jupyter app and fill in the form — project, partition, cores, memory, and time limit. The portal submits the Slurm job for you and gives you a button to connect when it starts.
Option 2: galyleo
From a login node shell:
export PATH="/cm/shared/apps/sdsc/galyleo:${PATH}"

galyleo launch --account <project> --partition shared \
    --cpus 4 --memory 16 --time-limit 01:00:00 \
    --conda-yml environment.yml
Replace <project> with your project ID from the previous step. Instead of --conda-yml, you can point galyleo at an existing environment with --conda-env <name> or at a container with --sif <path>.
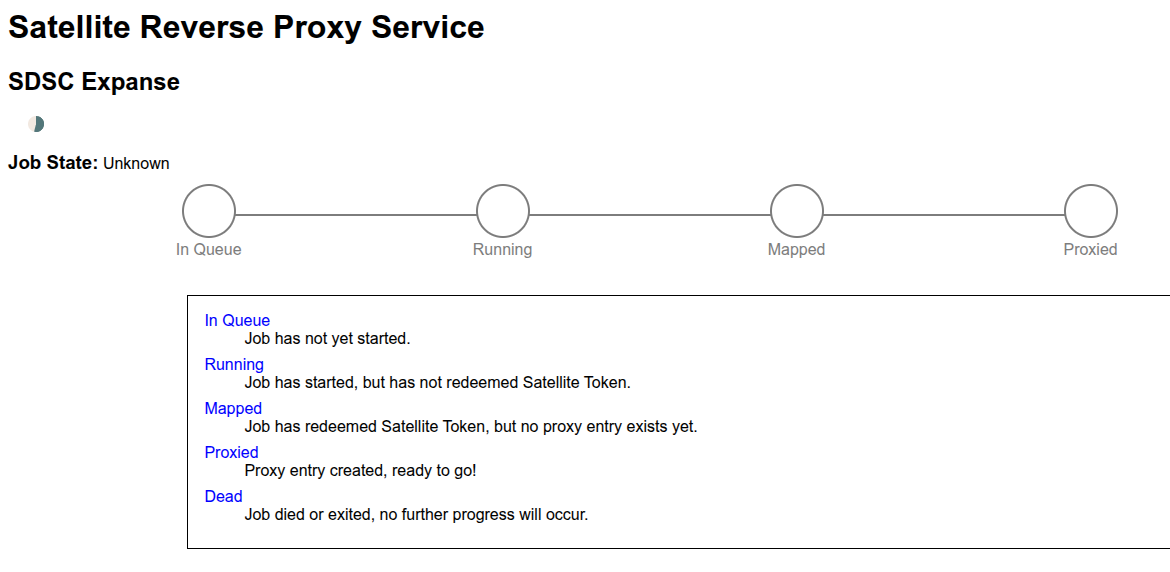
galyleo queues a Slurm job and prints a token-protected URL on expanse-user-content.sdsc.edu. Open it in your browser; the page tracks the job through In Queue, Running, and Mapped. Your notebook is ready once it reaches Proxied.
Closing the browser tab does not stop the job. It keeps running and keeps charging your allocation. Stop it explicitly:
squeue -u <your_username>
scancel <JOBID>
Expanse charges for resources reserved, not resources used — an idle notebook costs the same as a busy one.
Cloning a NIDS Module
From a login node shell, clone the module repository your instructor gave you into your home directory. For example:
git clone https://github.com/CAIDA/nids-expanse-2026.git
Then open the notebook from the Jupyter file browser and start working.
Going Further
This page stops once you have a notebook running. The nids-expanse-2026 repository carries on from there, in four lessons:
0_hello_world_to_expanse— account setup and first login, the material summarized above1_setting_up_env— configuring your shell environment on Expanse2_running_juypter_notebook— running the demo notebook3_running_batch_job— submitting batch jobs with Slurm
Note: That repository was written for a specific course and hardcodes its project ID and instructor file paths. If you are on a different allocation, substitute your own project ID and paths.
Need help with Expanse? See Expanse Help for consulting, documentation, and training resources.